Wednesday, March 25, 2015
This tutorial is written for those with knowledge of PSP
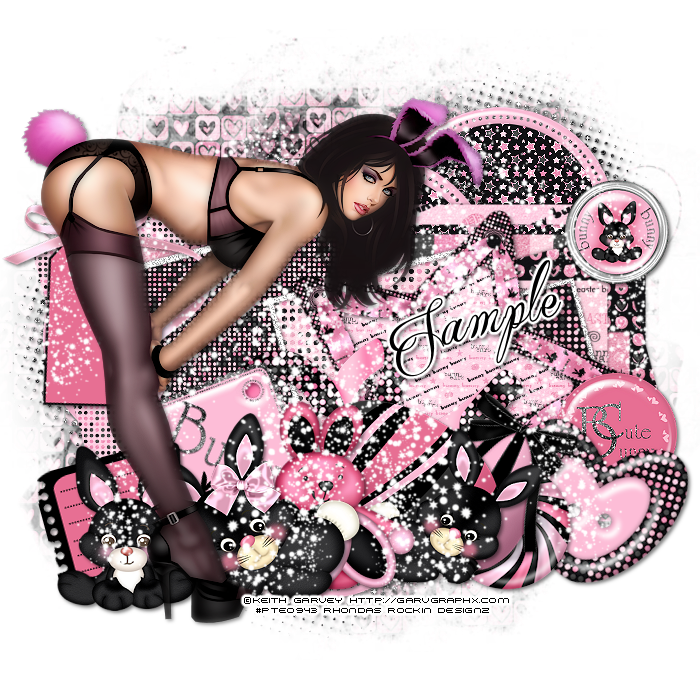
Supplies Needed:
Tube of choice: Im using the wonderful art work of Keith Garvey
This tube was purchase at PTE which has closed
You can purchase his work at his store HERE
FTU Scrap Kit by Addictive Pleasures HERE
Template #408 by Missy HERE
Easter Mask by Rocked by Rachel HERE
Don't forget to leave a thank you when downloading
Ok... Lets get Started:
Open template - Shift D to duplicate then close out original
Resize template 90% all layers
Canvas size 700x700
Deleted copyright
Click on raster 8 selections,select all, float,defloat
paste a paper of choice from the kit - I used paper3
selection invert delete
select none delete the original
Click on raster 9 selections,select all, float,defloat
paste a paper of choice from the kit - I used paper1
selection invert delete
select none delete the original
Click on raster 7 selections,select all, float,defloat
paste a paper of choice from the kit - I used paper9
selection invert delete
select none delete the original
Click on copy of raster 7 selections,select all, float,defloat
paste a paper of choice from the kit - I used paper4
selection invert delete
select none delete the original
Click on raster 3 & copy of 3 selections,select all, float,defloat
paste a paper of choice from the kit - I used paper5
selection invert delete
select none delete the original
Click on raster 2 selections,select all, float,defloat
paste a paper of choice from the kit - I used paper10
selection invert delete
select none delete the original
Click on raster 5 selections,select all, float,defloat
paste a paper of choice from the kit - I used paper4
selection invert delete
select none delete the original
Click on copy of raster 5 selections,select all, float,defloat
paste a paper of choice from the kit - I used paper6
selection invert delete
select none delete the original
Click on copy 2 raster 5 selections,select all, float,defloat
paste a paper of choice from the kit - I used paper4
selection invert delete
select none delete the original
Add glitter to all frames
Place your main tube
Now time to add our elements
I used the following:
Bunny
Bunny 2&3
Button
Button 2&3
Candy
Egg
Eggs
Frame 4
Heart
Label
Ribbon
Sign
Sparkles
Star 2
Tag
Merge your layers
Open paper 7 and apply mask
Place your name where you like it
Add the Copyright and your License Number for the tube
Resize to your liking and save as PNG
This tutorial was created on March 25,2015 by Rhonda
Any resemblance to another Tag or Tutorial is purely coincidental

Subscribe to:
Post Comments
(Atom)
Grab My Blinkie

I CT For


Blogs I Visit


0 comments:
Post a Comment